At first look, the Angry Birds looks to be a simple game with minimal graphics and design work. However trust me when I say that the artwork that some take for granted, actually goes to define the core experience of the game.
The first thing a user sees when he/she starts an Angry Birds game is this:


Whichever version you may have played, the first Call to Action you see is the big Play button in the middle. Many games forget to give this action the importance it deserves. The difference that developers tend to forget is that this is a Mobile Game. The average user is not looking to spend the next one hour engrossed in your grand story and complex game play. The average user is trying to spend the next 10 minutes of their life doing something fun.
Drowning them in a menu system would have been the wrong way to go. Let us compare this menu style with some popular PC games:

Civilization IV

Modern Warfare

Starcraft 2
All of these 3 games are excellent games, however players of these games know that when they start these games; they are looking to spend the next 1 hour playing it. Which gives the designer the leeway to put as much information in the menu system. Also, the complexity of the game play means that a complex menu is a must for the user to enjoy the full spectrum of game play available.
This level of complexity is not needed for mobile games. Big buttons that are touchscreen friendly, as well bright colors and clearly defined shapes help to funnel to the player into the game play as fast as possible.
After selecting play, you move on to the level selection. And you see this:
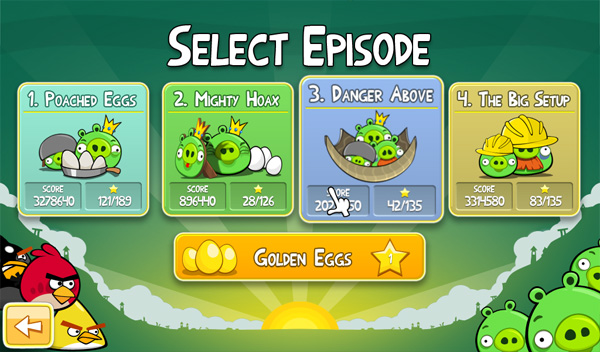

Again you see a simple yet elegant menu system which continues on with the design cues from the previous screens. You can also see a wide variety of color scheme being used through the game. Most of the screen has solid colors that guides you visually and lets you know what you are exactly looking at.
Green for the pigs, Red and other basic colors for the birds, the structures also use the same colors throughout the game. This helps the player to familiarize themselves with the map and challenges on a visual level. With just one look, a player can easily say what material is widely used in the structure of the map.
If you were to further simplify the design of the birds, it would be like looking at colored spots on the screen. Most of the basic characters are circular in shape. From the birds to the enemies, all of them have a circle theme. Looking at the following picture, could you imagine 2 green dots and 1 red dot in the middle?

3 dots, 2 green and 1 red.
Now take a closer look the following picture of the Red Bird.
A red circle with a beak!
If I asked you to simplify the design of a bird, how would proceed? What would you remove from the basic idea of a bird? Would you remove the neck? the legs? the wings? the feathers? What is left after removing all of these?
Only the head of the bird is left. However is is this exact simplicity that you see in the Angry Birds. It is like someone sketched a bird and only colored the head while removing everything else.
Now add a base color to the bird, apply a simple 3 tone color scheme and you are done. Embellish the design with some visual cues like eyebrows and a mouth to convey emotions and you have an angry bird.
This layered tone design is evident throughout the game. From the colored backgrounds, to pigs and everything else in between, you see this layered effect of different hues of the base color overlapping the basic shape.

6 green dots, 1 black dot, 1 blue dot, and 2 red dots!
No comments:
Post a Comment